Image Slider

Wednesday, 31 October 2012

Halal-friendly Australia


Today, to my surprise, the chicken salt shaker in Aldi is actually halal! Alhamdulillah.
I've been looking so long for chicken seasoning outside Indonesian brand that is halal.
I'm happy with my decision to trade down my grocery shopping to Aldi because they provide cheap products and halal cooking ingredients as well. For your information, Aldi is a supermarket in Australia (they have it in US as well) that provides cheap products under their own brand (99%). 

Some other products with halal label are:


salted butter

various kinds of cheeses (mozzarella, tasty-vintage cheddar)
  

unsalted butter

This really shows that Australia is very halal-friendly! 
Well, we can't deny that muslim community have grown so much in Australia and maybe it's been highly demanded along with the growing number of muslims in Australia.
If I find new stuff with halal label at Aldi, I will surely give an update ;)

Tuesday, 30 October 2012

Mango Platter

November is the season for mangoes in Australia! Yippie! Finally, a fruit that makes me feels at home. About two weeks ago I went to Sydney Paddy's Market on Saturday for the first time. It was a fruits & veggies heaven. They even have those Asian hard-to-find fruits & veggies! I ended up buying so many green and red chillies, very hot red chillies, and 15 sticks of lemongrass. Because mangoes are in season now, many sellers offer mangoes in big boxes at a low price. We decided to get one box (around 30 mangoes) for $25.


Last week we were invited to our friend's home to celebrate Eid together and I planned to bring mango cupcakes. Usually I use 4-stars rated recipes to make sweet desserts. But this time I tried something else. I was reading through Coles Magazine where they featured a recipe for mango cupcakes and decided to use it. Since I'm still new in cooking world, whenever I read a list of ingredients I cannot imagine how the food would turn out like. So, I went with the recipe completely without changing anything. Unfortunately, it turned out that the cream was tasteless (I rechecked the recipe again and it didn't mention any sugar at all for the cream) and the cupcake wasn't sweet. 


Now this is the part where creativity is challenged! I added sugar and mango puree to the cream to make it more flavorful. It still didn't work. The cream is really yummy, but it's not stiff enough to decorate the top of the cupcake (because it wasn't butter cream). I was exhausted that night, so I stopped trying and kept the cupcakes in the fridge overnight. The next morning, I re-oven the cupcakes for 5-10 minutes. Surprisingly, the outside becomes yummy crunchy! Then I had the idea to make a mango platter: vanilla cupcake served with mango cream and diced mango. At the end, we munched the whole batch of cupcakes ourselves and brought store-bought cookies to our friend's home, hehe.

Ingredients:
  • Vanilla cupcake:
  • 160 gr, room temperature
  • 3/4 cup caster sugar
  • 3 eggs
  • 1 tsp vanilla extract
  • 2 1/2 cups self raising flour
  • 1 cup milk 

  • Cream:
  • 200ml thickened cream
  • 1 tbsp sugar
  • 1/2 mango, pureed

How to make:
  • Preheat oven to 180 degrees Celcius. Line muffin pan with paper cups.
  • Beat butter and sugar until smooth and pale using mixer.
  • Add eggs one at a time, beating well after each addition. Beat in vanilla.
  • Sift half of flour over mixture and fold in gently. Add milk and the remaining sifted flour. Then spoon into the muffin cups.
  • Bake for 20 minutes. Leave muffin pan in the oven for 5 minutes, then let cool in wire rack.
  • Serve on a plate with mango cream and diced mango.

Notes:
  • If you want sweeter cupcake, I recommend to add 1/4 cup more of caster sugar
  • If you want the cupcake to taste more vanilla-y you can add 1/2 tsp more of vanilla extract
  • Best served when the cupcake is still warm and the cream is fridge-cool


Monday, 29 October 2012

My First Photo Competition

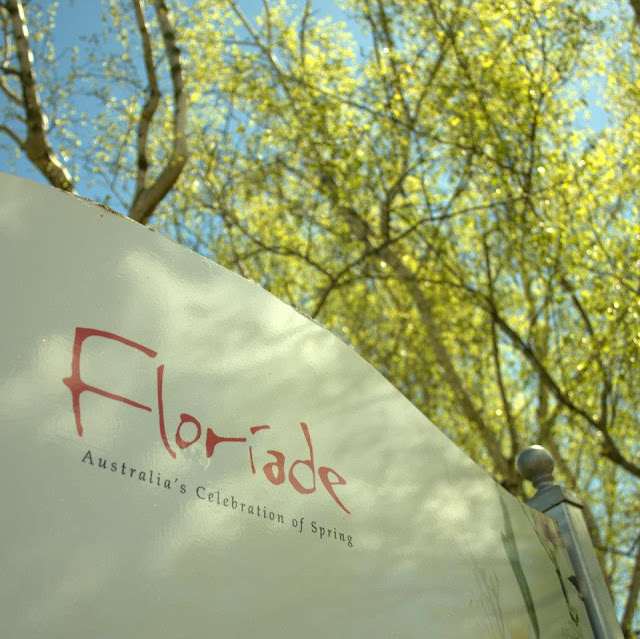
Last month, husband and I went to Canberra to see the Floriade and visit some of his friends. Floriade is Australian spring festival that is held in Canberra every year. As you know, spring festival is identical with flower festival. In Floriade you will find beds of tulips and poppies and many other exhibitions. The Commonwealth Park (where the Floriade is held), is not that big compared with Showa Kinen park in Japan. Me and Honey finished seeing every corner, eating churros, and taking pictures in only 2 hours. That's quite fast compared to my 4-hour trip in Showa Kinen, hehe.

Anyway, in Floriade, there is also photo exhibition which exhibits pictures from the previous Floriade photo competitions. The pictures were large-printed and placed randomly around the park. I don't know why suddenly I wanted to enter the competition. So, we went around the park and see the winning pictures, try to find out the key to winning. Actually, there is nothing really special about those pictures (except a few). So, I thought I'd give a shot.

I had to find a "different" idea. I avoided taking pictures of the flower only and macro shots (I didn't have the lens anyway, haha). Then, I came up with the idea of making heart-shape with our hands and have the flower bed as the blurry background. It took me many attempts (and a couple of different flower beds to see how the background turned out) to get the perfect heart-shape and photo angle. Honey was whining a couple of times too because he couldn't hold his hands up too long. Seriously, with only two of us and two usable hands, this is called "niat banget!". It was a pain for me as well because I had to hold my left hands up and hold the camera (and snap the shutter button) with my right hand.

In the competition, each person can submit up to two entries. I had a couple of other shots but I somehow feel this one is going to make it. Besides, I was too confused which other photo to submit, so at the end I only submitted one.

A few days ago my photography friend (who taught me a lot about photography when I was in Japan), mas Reza, posted on my Facebook wall the link of the Floriade photo competition announcement. He found the link when he was browsing and saw my name on one of the photo. I even already forgot about it, actually, because there wasn't any notification. Alhamdulillah the picture made it as the finalist. I didn't get the major prize, but I'm happy enough as the finalist since this is my first time to enter a photo competition. Lastly, my husband says, "see, you can even win the competition by using your lame lens-kit ;)"~ he's finding excuse for me to keep taking pictures regardless how crappy the lens-kit is (before I am united again with my prime).


And here's the winning picture (cropped)!  


Other shots from the Floriade:

My First Photo Competition

Last month, husband and I went to Canberra to see the Floriade and visit some of his friends. Floriade is Australian spring festival that is held in Canberra every year. As you know, spring festival is identical with flower festival. In Floriade you will find beds of tulips and poppies and many other exhibitions. The Commonwealth Park (where the Floriade is held), is not that big compared with Showa Kinen park in Japan. Me and Honey finished seeing every corner, eating churros, and taking pictures in only 2 hours. That's quite fast compared to my 4-hour trip in Showa Kinen, hehe.

Anyway, in Floriade, there is also photo exhibition which exhibits pictures from the previous Floriade photo competitions. The pictures were large-printed and placed randomly around the park. I don't know why suddenly I wanted to enter the competition. So, we went around the park and see the winning pictures, try to find out the key to winning. Actually, there is nothing really special about those pictures (except a few). So, I thought I'd give a shot.

I had to find a "different" idea. I avoided taking pictures of the flower only and macro shots (I didn't have the lens anyway, haha). Then, I came up with the idea of making heart-shape with our hands and have the flower bed as the blurry background. It took me many attempts (and a couple of different flower beds to see how the background turned out) to get the perfect heart-shape and photo angle. Honey was whining a couple of times too because he couldn't hold his hands up too long. Seriously, with only two of us and two usable hands, this is called "niat banget!". It was a pain for me as well because I had to hold my left hands up and hold the camera (and snap the shutter button) with my right hand.

In the competition, each person can submit up to two entries. I had a couple of other shots but I somehow feel this one is going to make it. Besides, I was too confused which other photo to submit, so at the end I only submitted one.

A few days ago my photography friend (who taught me a lot about photography when I was in Japan), mas Reza, posted on my Facebook wall the link of the Floriade photo competition announcement. He found the link when he was browsing and saw my name on one of the photo. I even already forgot about it, actually, because there wasn't any notification. Alhamdulillah the picture made it as the finalist. I didn't get the major prize, but I'm happy enough as the finalist since this is my first time to enter a photo competition. Lastly, my husband says, "see, you can even win the competition by using your lame lens-kit ;)"~ he's finding excuse for me to keep taking pictures regardless how crappy the lens-kit is (before I am united again with my prime).

And here's the winning picture (cropped)!
http://www.abc.net.au/local/photos/2012/10/22/3615995.htm


Other shots from the Floriade:
http://augystagram.blogspot.com.au/2012/10/floriade-2012-be-spring-inspired.html
http://augystagram.blogspot.com.au/2012/10/lalala.html


*reposted from my old blog
Friday, 12 October 2012

Fresh Strawberry Ice Cream


When I was about to wash dishes on the other day, I thought of making ice cream out of my frozen strawberries. Since the recipe was quick and easy to make, I decided to go on with it so I can wash the utensils right away. It's more efficient, hehe.

Ingredients:
  • 200gr strawberries
  • 2 tbsp of sugar
  • 50 ml thickened cream (or whipping cream)
  • 1 tsp lemon juice

How to make:
  • Peel and cut the fruit into small pieces. Then, put it away in the freezer until frozen.
  • Pour in the frozen fruit into food processor. Add sugar, thickened cream, and lemon juice. Blend them all together until smooth.
  • Scoop with ice cream scoop and place into each dessert bowl.
  Notes:
  • Chill the work bowl and dessert bowl in the refrigerator before making the ice cream. But I didn't do it though :D.

You can change the fruit with other fruits available. Or you can also store seasonal fruits in the freezer so you can make it anytime all year round! This tastes a lot better than the store bought ice cream. The strawberries tastes so real and fresh. Hmm... it tastes a bit like Haagen Dazs (which they don't have it in Sydneeeyyy!!!!). Hope you enjoy the recipe!

Source: Cooking with the Dog

Old-School Baked Potatoes


A while ago I was cooking chicken corn cream soup and was thinking of what carb dish would go great with it. Since I was bored with mashed potato already and thought that making another dish that contains milk would make the whole meal tastes so milky, I thought "why not make baked potato!?"

I searched for a recipe in Allrecipes and made some additions to it.

Ingredients:
  • Potatoes
  • Olive oil
  • Salt
  • Ground hot chillies
  • Black or white pepper
  • Shredded cheddar cheese and butter

How to make:
  • Scrub the potatoes' skin with sponge. Clean it off from the dirt.
  • Make holes with fork to enable steam to come out from the potatoes while it's being baked
  • Rub each potatoes with olive oil
  • Sprinkle salt, ground hot chillies, and pepper
  • Bake in the oven (175 degrees C) for 1.5 hour
  • While it's still hot, slice it in half and stuff it with shredded cheese. Put it back in the oven and let it melt.

Note:
  • To melt the cheese, you don't need to turn on the oven again. It will melt with the heat after the baking process.
This baked potato is awesome! The skin is crispy and the ground hot chillies made the potatoes taste even better! Hope you enjoy this recipe!

Fruit Creme


I had some leftover strawberries and thickened cream after making a strawberry shortcake as a gift for Honey's team leader while we're visiting her. And lots and lots of alhamdulillah, she gave us a lot of navel oranges to bring home! I was like, "No way, there are only 2 of us at home. How are we going to finish this!?!?." Sooo... yeah, as my attempt to finish all the strawberries and cream before they are not edible enough, I made this simple and easy fruit creme in cups.

Ingredients:
  • 2 kinds fruits of choice, diced (I used strawberries and skin-peeled navel oranges)
  • 300 ml Thickened cream (or liquid whipping cream)
  • 1 1/2 tbsp of sugar
  • few drops of vanilla extract

How to make:
  • Creme: Mix all of the ingredients (except the fruits, of course) in a bowl. Whisk until stiff (or until it forms soft peak, whichever you like)
  • In single cups, spoon in alternatively a spoon of strawberries, a spoon of creme, a spoon of navel oranges, and a spoon of creme until it reached the desired height.

Notes:
  • This dessert will taste even more fantastic if you add layers of crumbed cookies, such as biscuits or marie.
It's so easy, right? The ingredients were minimum and there's no need to bake or cook anything. Hope you enjoy!

Homemade Pizza


For the past month I've been craving for pizza several times. At least once in a week, I suppose. The price of eating out in Australia is quite expensive, so I am trying my very best to be able to cook (almost) anything at home to avoid spending. Alhamdulillah I bought a pizza pan a month ago, so I was very excited to make use of it as well! I used a (almost) 5 star recipe from Allrecipes for the crust and top it off with any toppings desired.

Ingredients:
  • 2 1/4 tsp active dry yeast
  • 1/2 tsp brown sugar
  • 1 1/2 cups warm water
  • 1 tsp salt
  • 2 tbsp olive oil
  • 3 1/3 cups all purpose flour

How to make:
  • In a large bowl, dissolve the yeast and brown sugar in the warm water. Let it sit for 10-15 minutes until foamy
  • Stir salt and oil into the yeast solution. Mix in 2 1/2 cups of the flour
  • Turn dough out onto a clean, well floured surface, and knead in more flour until dough is no longer sticky. Place dough into a well oiled bowl and cover with cloth. Let the dough rise 
  • until double (about 1 hour). Punch down the dough and form a tight bowl.
  • Preheat oven to 220 degrees C. Lightly oil the pizza pan and let dough rise for 15-20 minutes before topping and baking it.
  • Bake pizza in preheated oven about 15 to 20 minutes, or until crust and cheese are golden brown

 Notes:
  • A reviewer suggested to change the sugar to 1tbsp because it tasted too yeasty. I agree.
  • Make sure the water is WARM, because if it is too hot the yeast won't work. That's what happened with my previous 2 experiments. It resulted in thin uncooked crust. 
  • I didn't oil the pizza pan, instead I lightly floured it.
  • The crust came out pretty thick. It's like double the thickness of ordinary pizza. So, if you would like thinner ones, you can actually make 2 pans of pizza out of this.
  • If you don't have brown sugar, you can substitute with the same amount of white sugar. 

You can top your pizza with your favorite tomato pasta sauce, sausage, mushroom, basil leaves, salami/pepperoni, capsicum, tuna, chicken, olive, and loads of cheese. Hope you enjoy this recipe as much as I do!

Source: Allrecipes

-------------------------------------------------------------------------------------------------------------------

Selama sebulan terakhir ini saya beberapa kali kangen makan pizza (langsung kebayang Pizza Hut). Setidaknya sekali dalam seminggu tiba-tiba kepingin makan pizza. Harga makan di luar di Australia cukup mahal, jadi saya mencoba untuk selalu memasak di rumah untuk menghindari pengeluaran. Alhamdulillah, sebulan yang lalu saya membeli loyang pizza, jadi yaa makin kepingin bikin pizza deh. Saya menggunakan (hampir) 5 Bintang resep dari Allrecipes untuk kerak dan top it off dengan topping yang diinginkan.
 

Bahan:
  •      2 1/4 sdt ragi
  •      1/2 sdt brown sugar
  •      1 1/2 cangkir air hangat
  •      1 sdt garam
  •      2 sdm minyak zaitun
  •      3 1/3 cangkir tepung terigu

Cara membuat:
  • Dalam mangkuk besar, larutkan ragi dan gula dalam air hangat. Biarkan selama 10-15 menit sampai berbusa.
  • Masukkan garam dan minyak ke dalam larutan ragi. Campur dalam 2 1/2 cangkir tepung.
  • Letakkan adonan di permukaan yang sudah ditaburi tepung, dan uleni tepung lagi sampai adonan tidak lengket. Tempatkan adonan ke dalam mangkuk yang telah diminyaki (supaya adonan tidak kering), kemudian tutup dengan kain. Biarkan sampai adonan naik dua kali lipat (sekitar 1 jam). Kempiskan adonan dan bulatkan menjadi bola.
  • Panaskan oven hingga 220 derajat C. Beri sedikit minyak pada loyang pizza dan biarkan adonan naik selama 15-20 menit dahulu sebelum topping dan memanggangnya.
  • Oven pizza sekitar 15 sampai 20 menit, atau sampai kulit dan keju menjadi coklat keemasan
   
Catatan:
  • Ada pembaca yang menyarankan untuk mengubah gula untuk 1sdm karena raginya terlalu berasa dan saya setuju dengan ini. 
  • Pastikan air yang digunakan hangat, karena jika terlalu panas ragi tidak akan bekerja. Sebelumnya saya sudah mencoba 2 kali membuat pizza namun selalu gagal (ternyata) dikarenakan air yang saya gunakan terlalu panas.
  • Roti yang dihasilkan resep ini cukup tebal. Dua kali lipat ketebalan pizza biasa. Jadi, jika Anda ingin pizza yang lebih tipis, Anda dapat membuat 2 loyang pizza dengan resep ini.
  • Jika Anda tidak memiliki brown sugar, Anda dapat mengganti dengan jumlah yang sama gula putih.

Untuk topping, Anda dapat menggunakan saus tomat yang dibubuhi oregano, sosis, ayam, daging asap, paprika, olive, tuna, dan keju mozzarella. Selamat mencoba!